Magento#
Talkable offers free extension for Magento 2.4 which allows you to integrate and use Talkable with your Magento store.
Prerequisites#
Magento 2.4
Warning
Magento 1.x is no longer supported. If you are currently using Magento 1.x, we recommend upgrading to Magento 2.4 to use the Talkable extension.
To check your Magento version, navigate to your store’s admin panel. The version number will be listed in the page footer.

Talkable account
Adobe Commerce account
If you do not have an Adobe Commerce account configured, follow these steps.
Installation#
Note
Installation via Composer requires an IT administrator with SSH access to the server where Magento 2 is hosted.
Get the Talkable extension
Visit the Adobe Commerce Marketplace and get the Talkable extension. https://commercemarketplace.adobe.com/talkable-magento2-integration.html

Open the terminal and navigate to the root directory of your Magento app.
Usually it’s
/var/www/html/.cd /var/www/html/
Run the following command to access the latest version of the Talkable extension.
composer require talkable/magento2-integration
Run the following command to enable the Talkable extension you just downloaded:
php bin/magento module:enable Talkable_Integration --clear-static-content
You should see the following output:
The following modules have been enabled: - Talkable_Integration
To make sure that the enabled modules are properly registered, run ‘setup:upgrade’. Cache cleared successfully. Generated classes cleared successfully. Please run the ‘setup:di:compile’ command to generate classes. Generated static view files cleared successfully.
As displayed in the sample output, you must now enable any additional modules. Run the following command to enable them:
php bin/magento setup:upgrade
To ensure that the CSS and JS on your Magento 2 store continues to work properly, you’ll need to run a static content deploy command.
php bin/magento setup:static-content:deploy -f
Installation via Composer is complete! You can now return to the Magento admin dashboard from your browser.
Accessing Talkable Configuration#
To access Talkable extension settings, navigate to Stores → Configuration in your Magento admin panel.
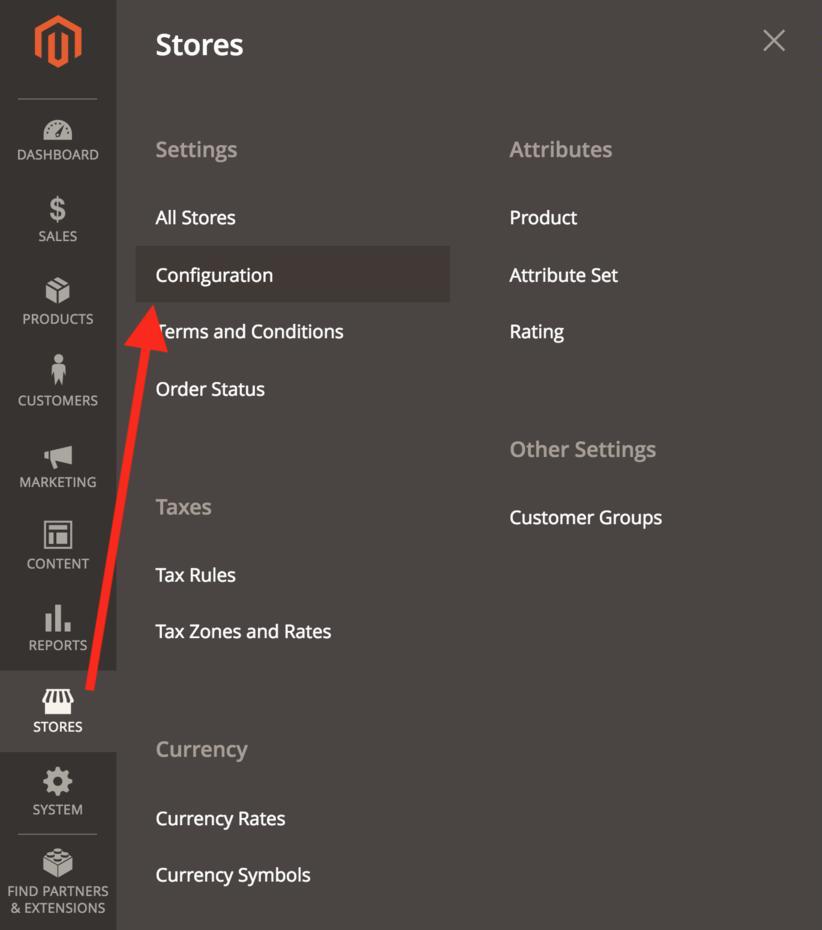
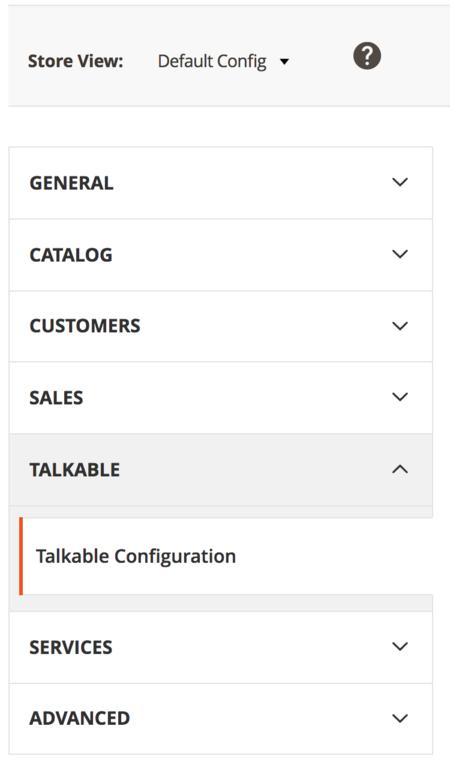
Then select Talkable → Talkable Configuration from the list of available configurations.
If you have multiple stores, select the desired Store View you want to change the settings for.
Configuring Talkable Extension#
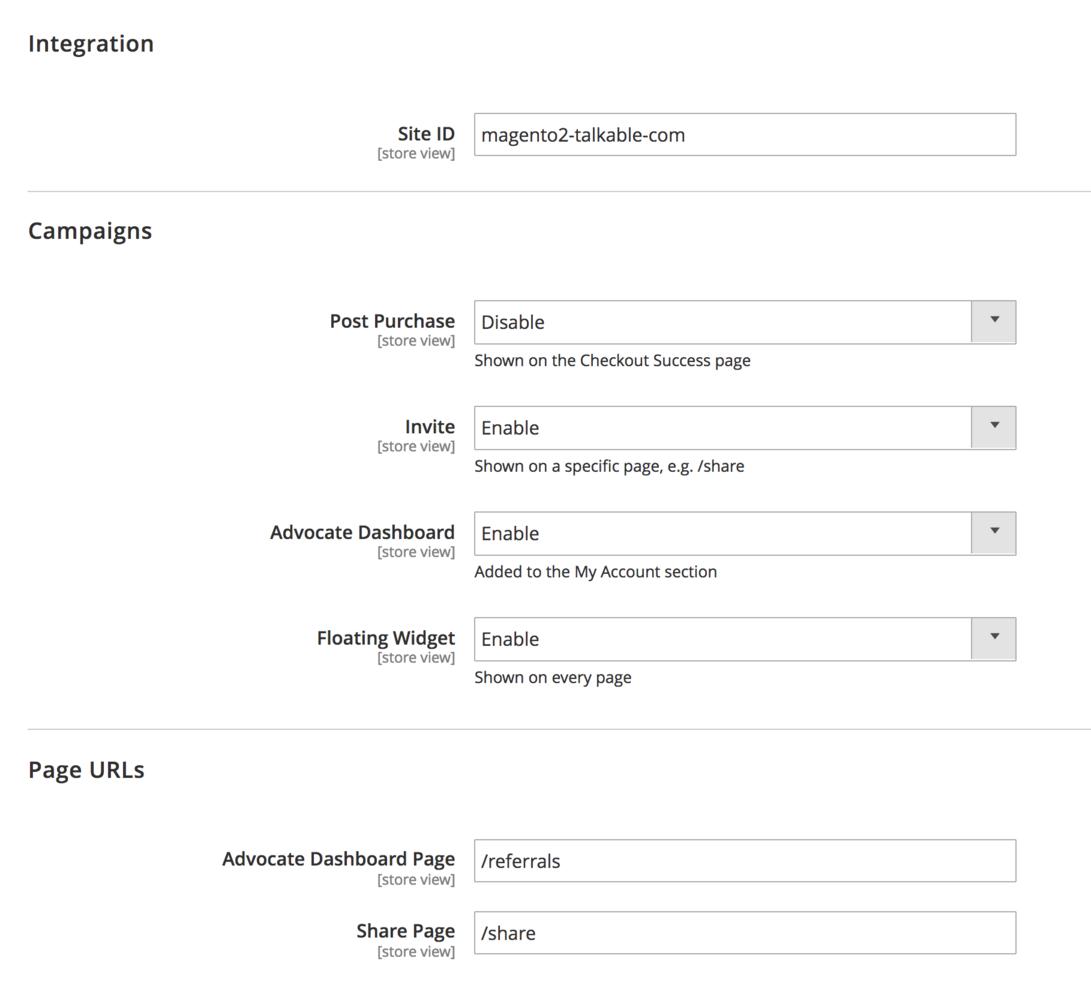
Expand Integration, Campaigns and Page URLs sections to see all available configuration options.
Integration#
The Integration section allows you to change the Talkable Site ID, which is used to connect your store to your Talkable account.

Warning
Only change this setting if you need to connect your store to a different site in the Talkable dashboard. An incorrect value will prevent your campaigns from showing.
You need to paste the Site ID from your Talkable Site Dashboard into this field.
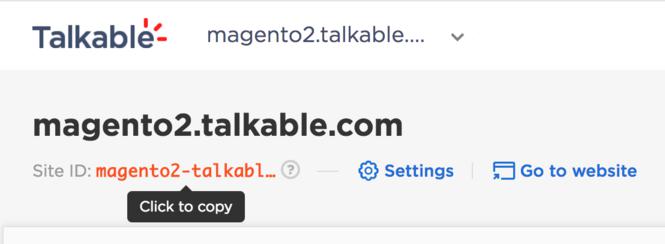
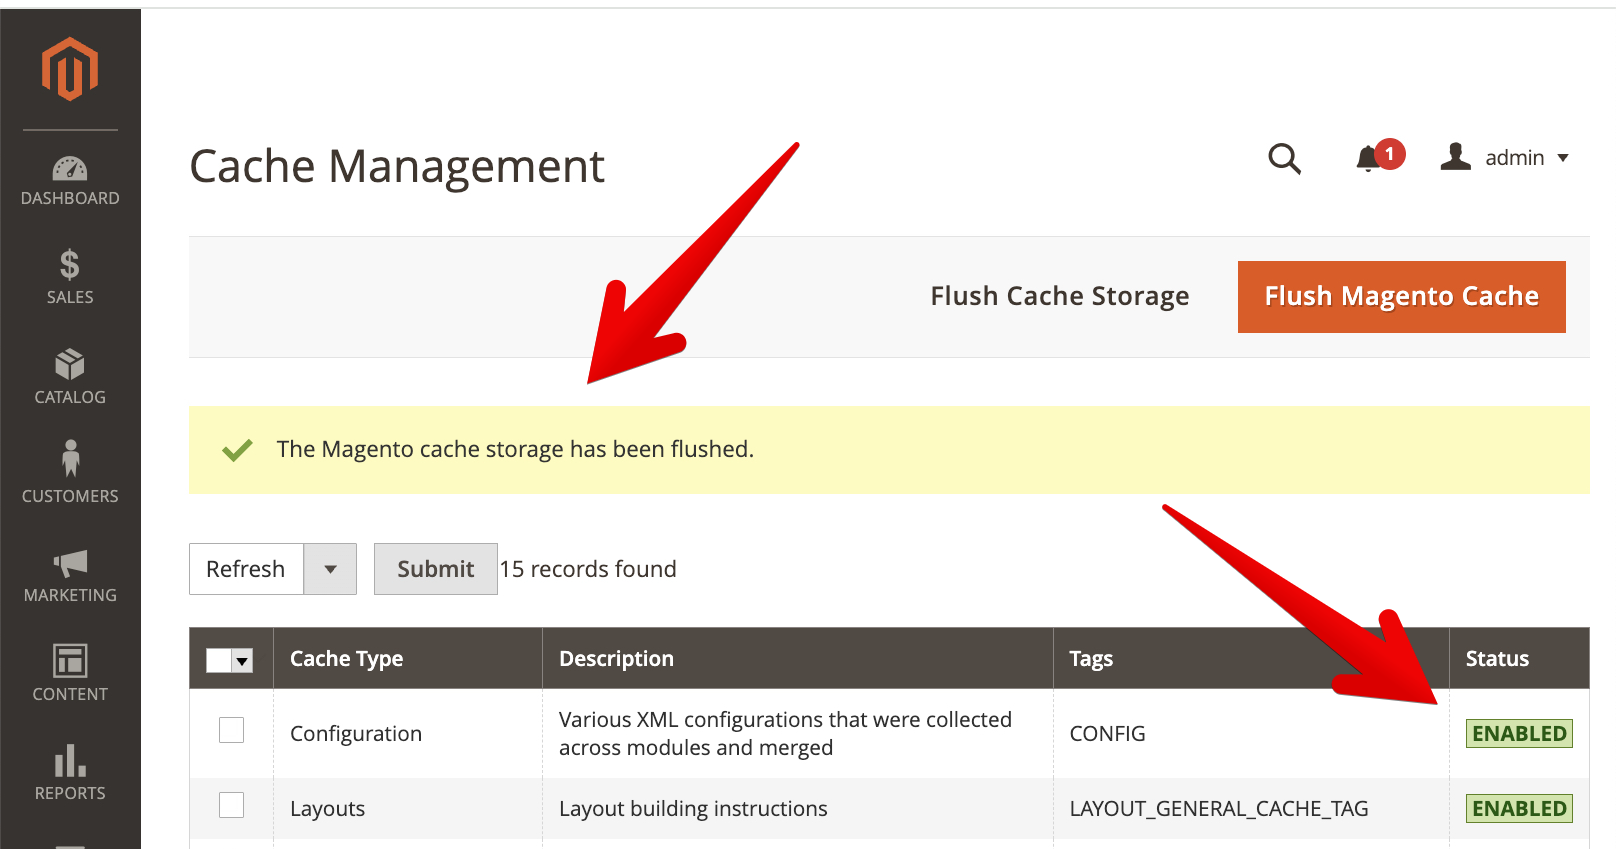
Changing the Site ID will invalidate the full page cache. Magento will display a warning message with a link to the Cache Management page.
You would need to follow Cache Management link and refresh the invalidated cache types.

As a result you should see the config status as Enabled.
Campaigns#
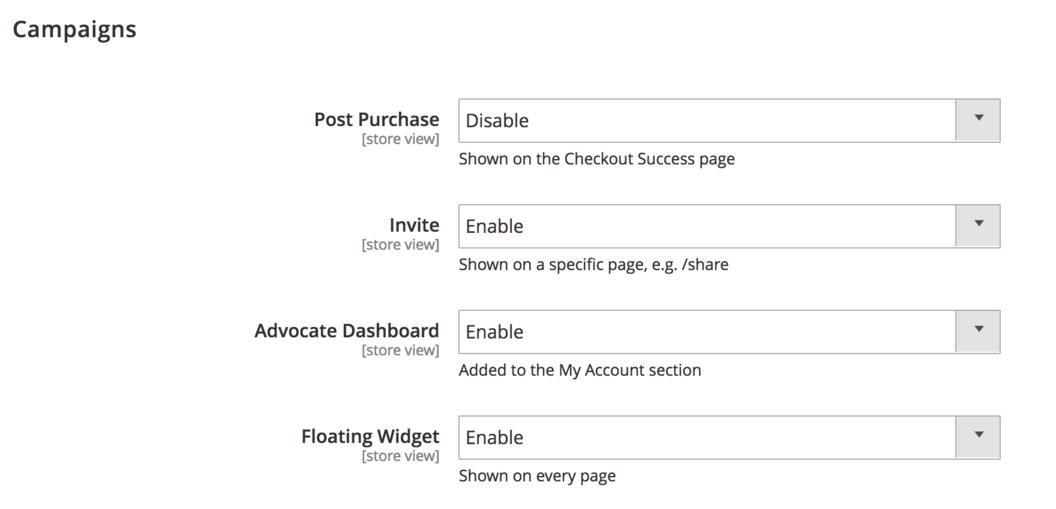
The Campaigns section allows you to enable or disable different types of campaigns on your site. For example, if you don’t have Standalone or Advocate Dashboard campaigns configured in Talkable, you can disable these campaigns in extension config, so the corresponding pages are not accessible.
Page URLs#
The Page URLs section allows you to change paths to the Standalone Share and Advocate Dashboard pages. The paths must match the placements you have configured in Talkable for this campaign type. Default values correspond to default placements in Talkable.

Warning
Only change these settings if you have configured custom placements for these campaign types in your Talkable dashboard. Incorrect values will prevent your Standalone or Dashboard campaign from showing.
