Validating the Integration#
Visual Confirmation Note#
In order to see visual confirmation you must create or have existing Talkable campaigns. Campaigns must be enabled for visual display (see examples below on how to enable campaigns). Note that enabling campaigns on production will allow your customers to see referral content. If you want to limit visual display, or want to validate on your production site without customers seeing visual display, then see the Test Mode Display section below.
Validation Checklist#
Perform a test checkout.
Confirm Visual Result You should see visual confirmation content on the checkout confirmation page if the post purchase campaign is enabled.
Confirm Data Result Navigate to Reports > Purchases tab inside the Talkable platform to ensure all parameters that you’re using in the post purchase script are being passed. Data populates in real time.
Visit your Home Page.
Confirm Visual Result You should see the floating Talkable Widget button.
Visit your Advocate Landing Page.
Confirm Visual Result You should see visual confirmation content in the location where you placed the Talkable Container DIV.
Visit your Referral Dashboard Page.
Confirm Visual Result You should see visual confirmation content in the location where you placed the Talkable Container DIV.
How to create or check for existing campaigns#
You’ll need to have a campaign of each type in order to validate display.
There are 5 types:
Post Purchase: displays as a pop up after checkout
Floating Widget: displays as a floating widget button on your home page (and every page)
Invite Standalone: displays inline on your /share advocate landing page
Advocate Dashboard Standalone: displays inline in your /referrals page
Claim by Name displays as a floating widget button on your checkout page.
Note
Claim by Name campaign has its own DIV container and can be shown along with the Floating Widget on the same page. The DIV id is talkable-claim-by-name.
How to create campaigns: Here’s a video showing you how to quickly create all campaigns in less than 1 minute https://youtu.be/HDK-zFlCAkw
How to enable campaigns: Here’s a video showing you how to enable campaigns (ignore any warnings for now and note the site display placement) https://youtu.be/HgR6WQYeASg
Test Mode Display#
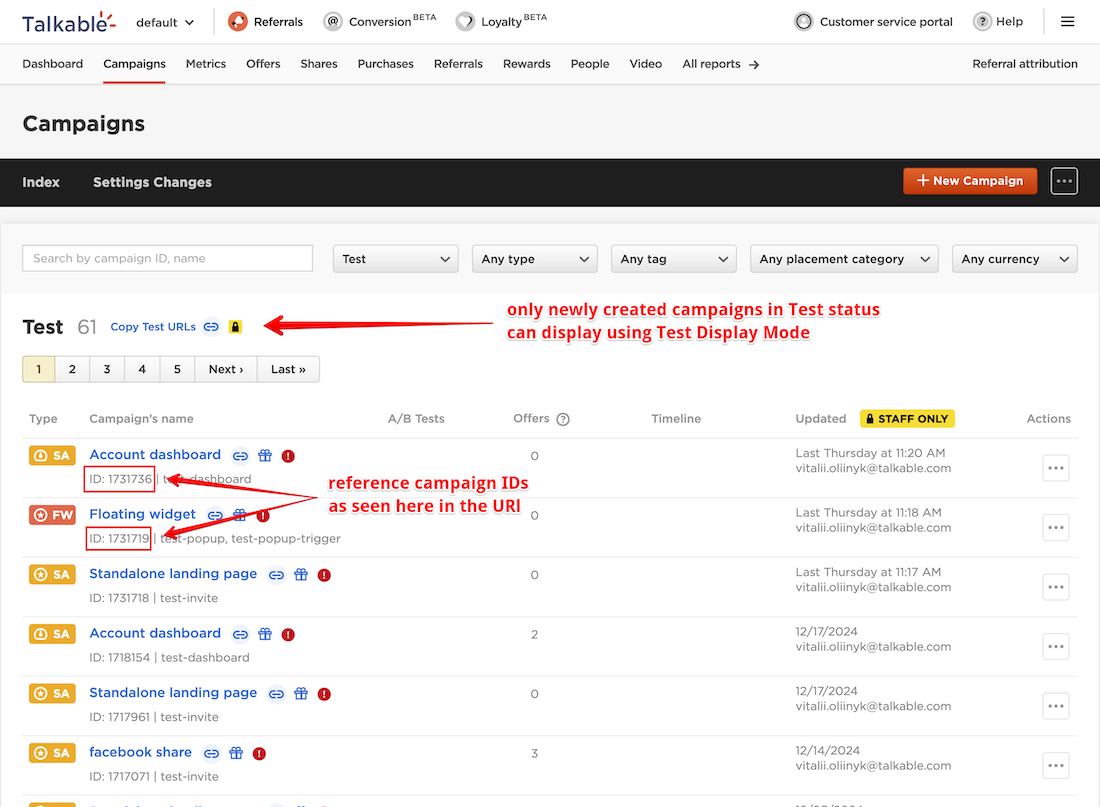
After creating campaigns, while still in test mode before activating, you can append a URL query string parameter to page where you want to display a campaign in test mode which prevents anyone else from seeing visual display. Note that each campaign has campaign ID under the campaign name and you can reference these in the URL using the following guidelines:
Floating widget on your homepage:
www.your-site.com?tkbl_campaign_id=11111
Advocate Landing Page /share:
www.your-site.com/share?tkbl_campaign_id=11112
Referral Dashboard:
www.your-site.com/referrals?tkbl_campaign_id=11113
Claim by Name widget:
www.your-site.com/cart?tkbl_campaign_id=11114 or www.your-site.com/checkouts?tkbl_campaign_id=11114
Note that campaigns must be newly created campaigns in test mode to be eligible for test mode display. Use the following image as a visual guideline: