Adding DNS records in Cloudflare#
Note
The instructions below use subdomain.example.com as an example of a custom domain where example.com is your domain.
In your Cloudflare dashboard, select the site you want to manage in Websites (e.g. example.com).
Go to DNS → Records and click “Add record”.
Select appropriate record type (might be NS, CNAME, MX, etc.).
In the “Name” field, enter only the subdomain part (e.g. subdomain if you want to add a record for subdomain.example.com).
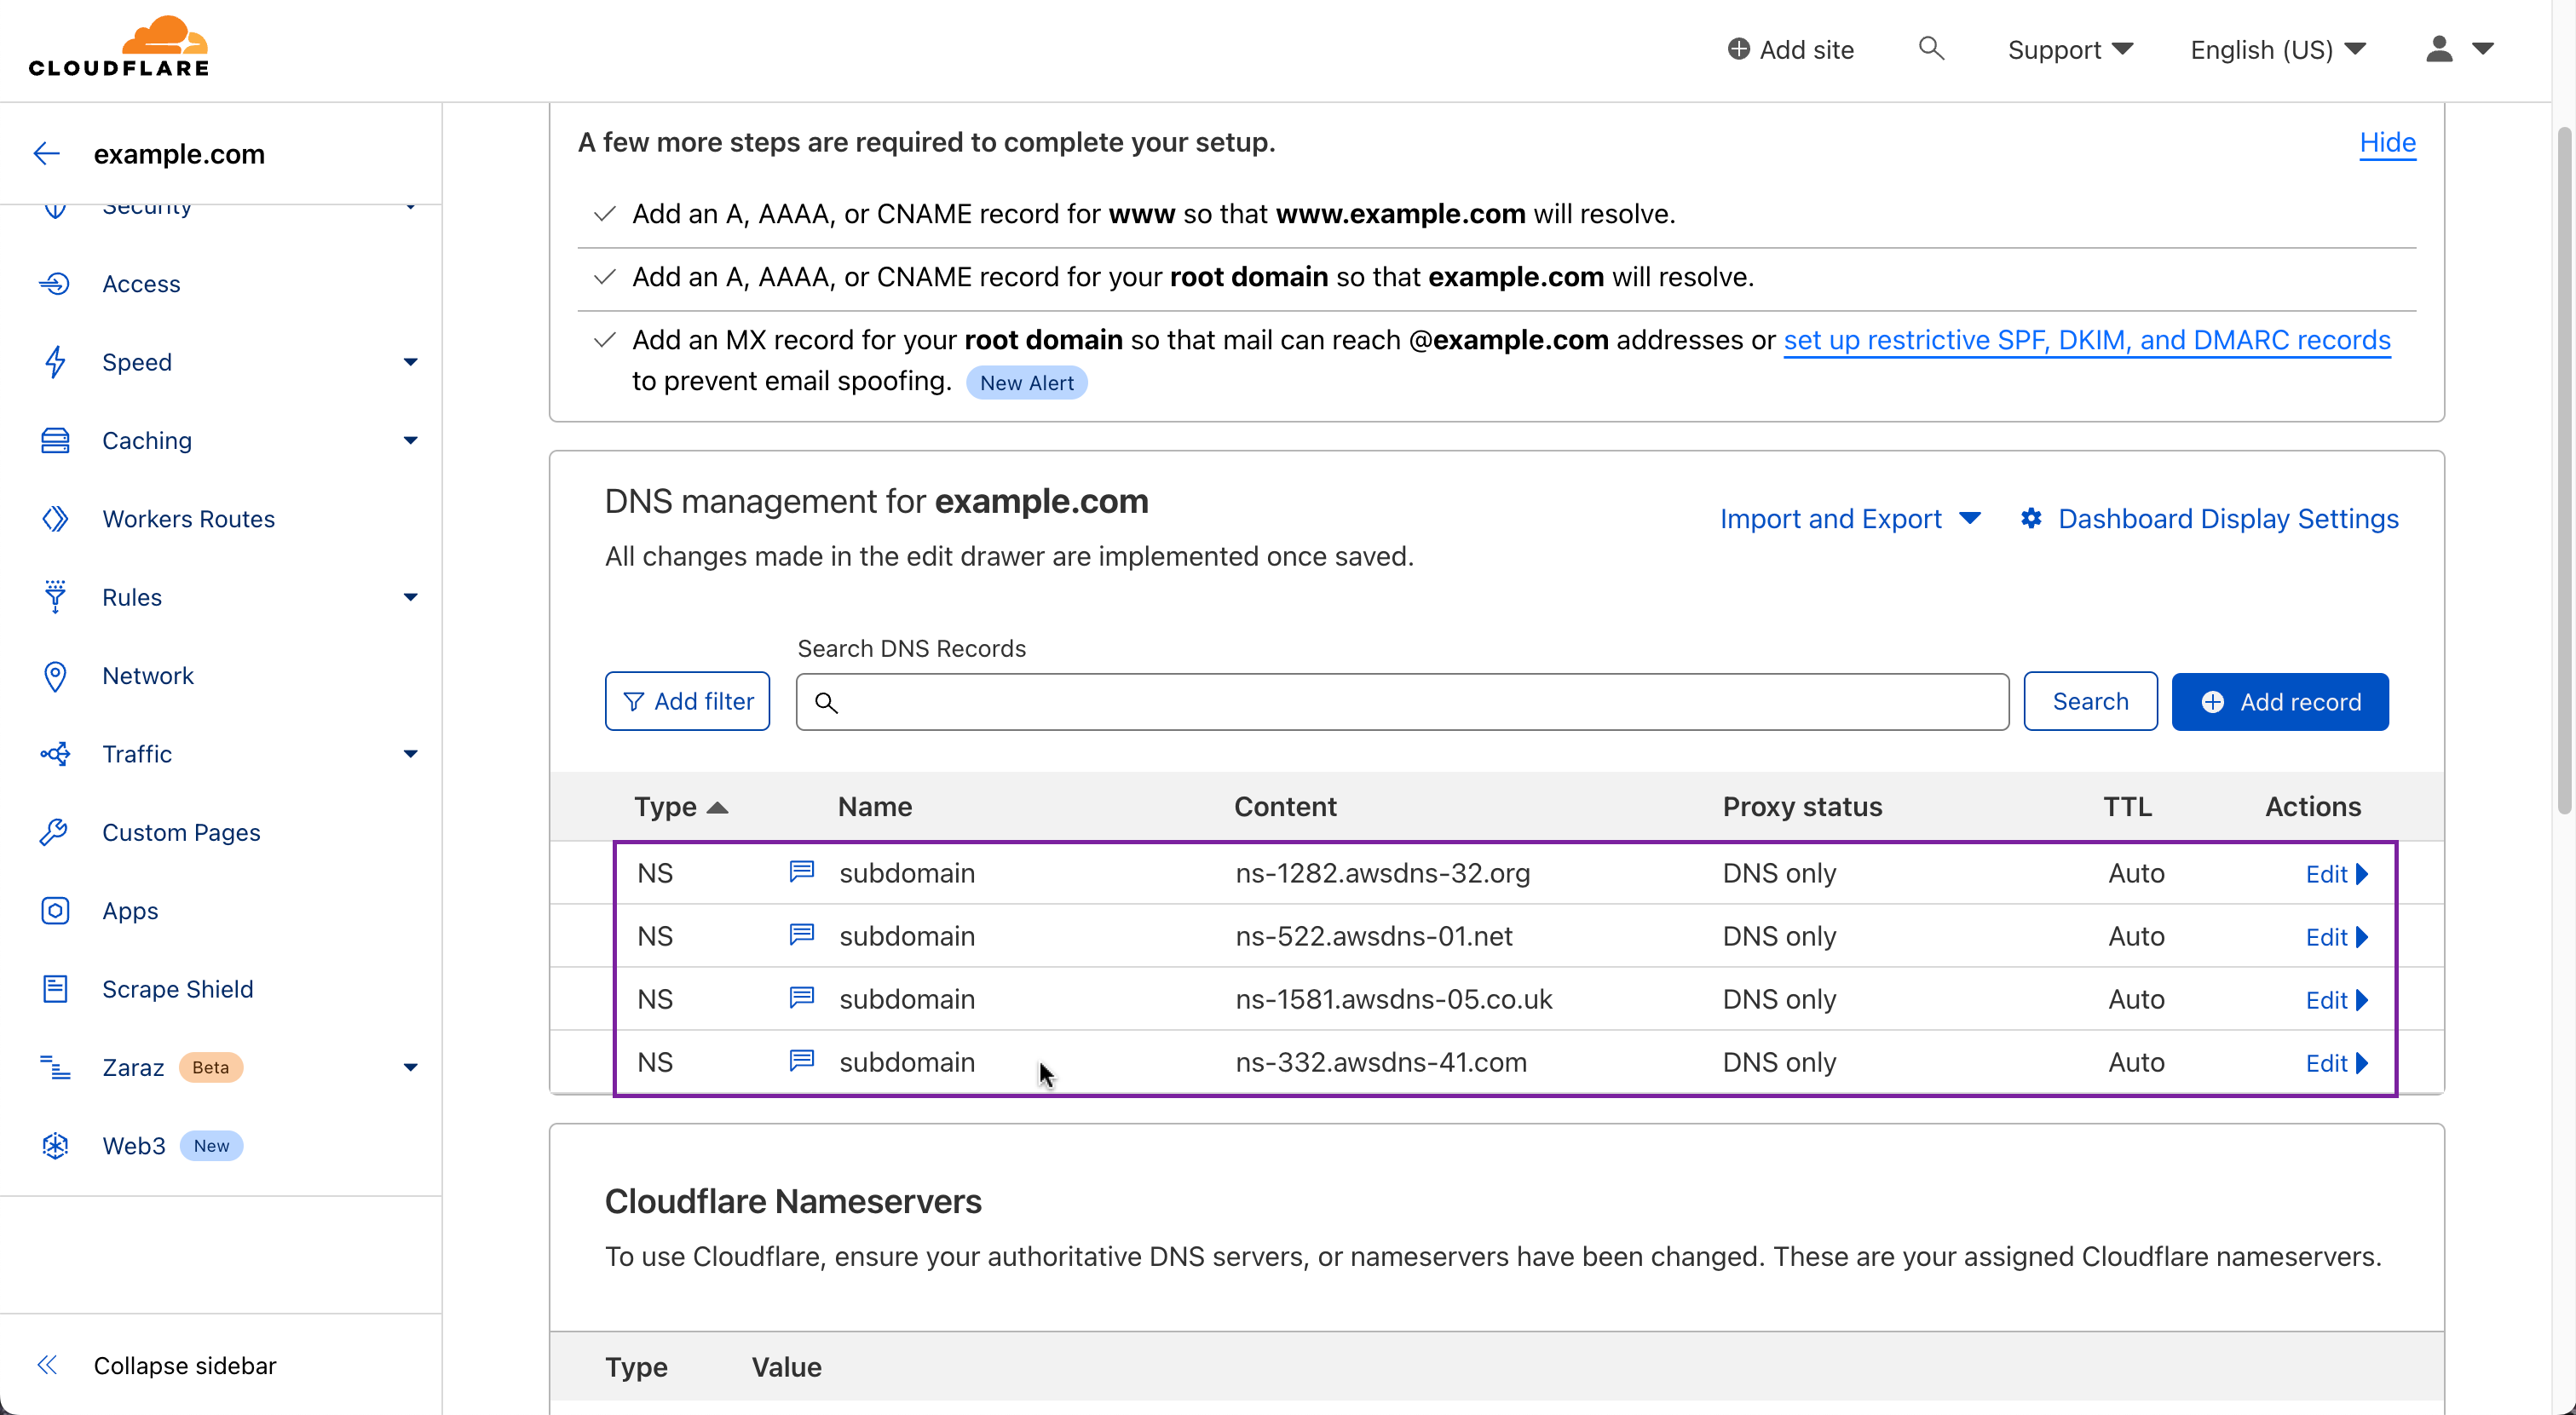
Copy the DNS record value from the Talkable custom domain settings into the “Value” field. Note: Unlike some other platforms, Cloudfront does not allow multiple values in NS record. Instead, you’ll need to add multiple NS records with the same name and different values.

Save the changes.
Example of properly added NS records: