Adding DNS records in AWS Route53#
Note
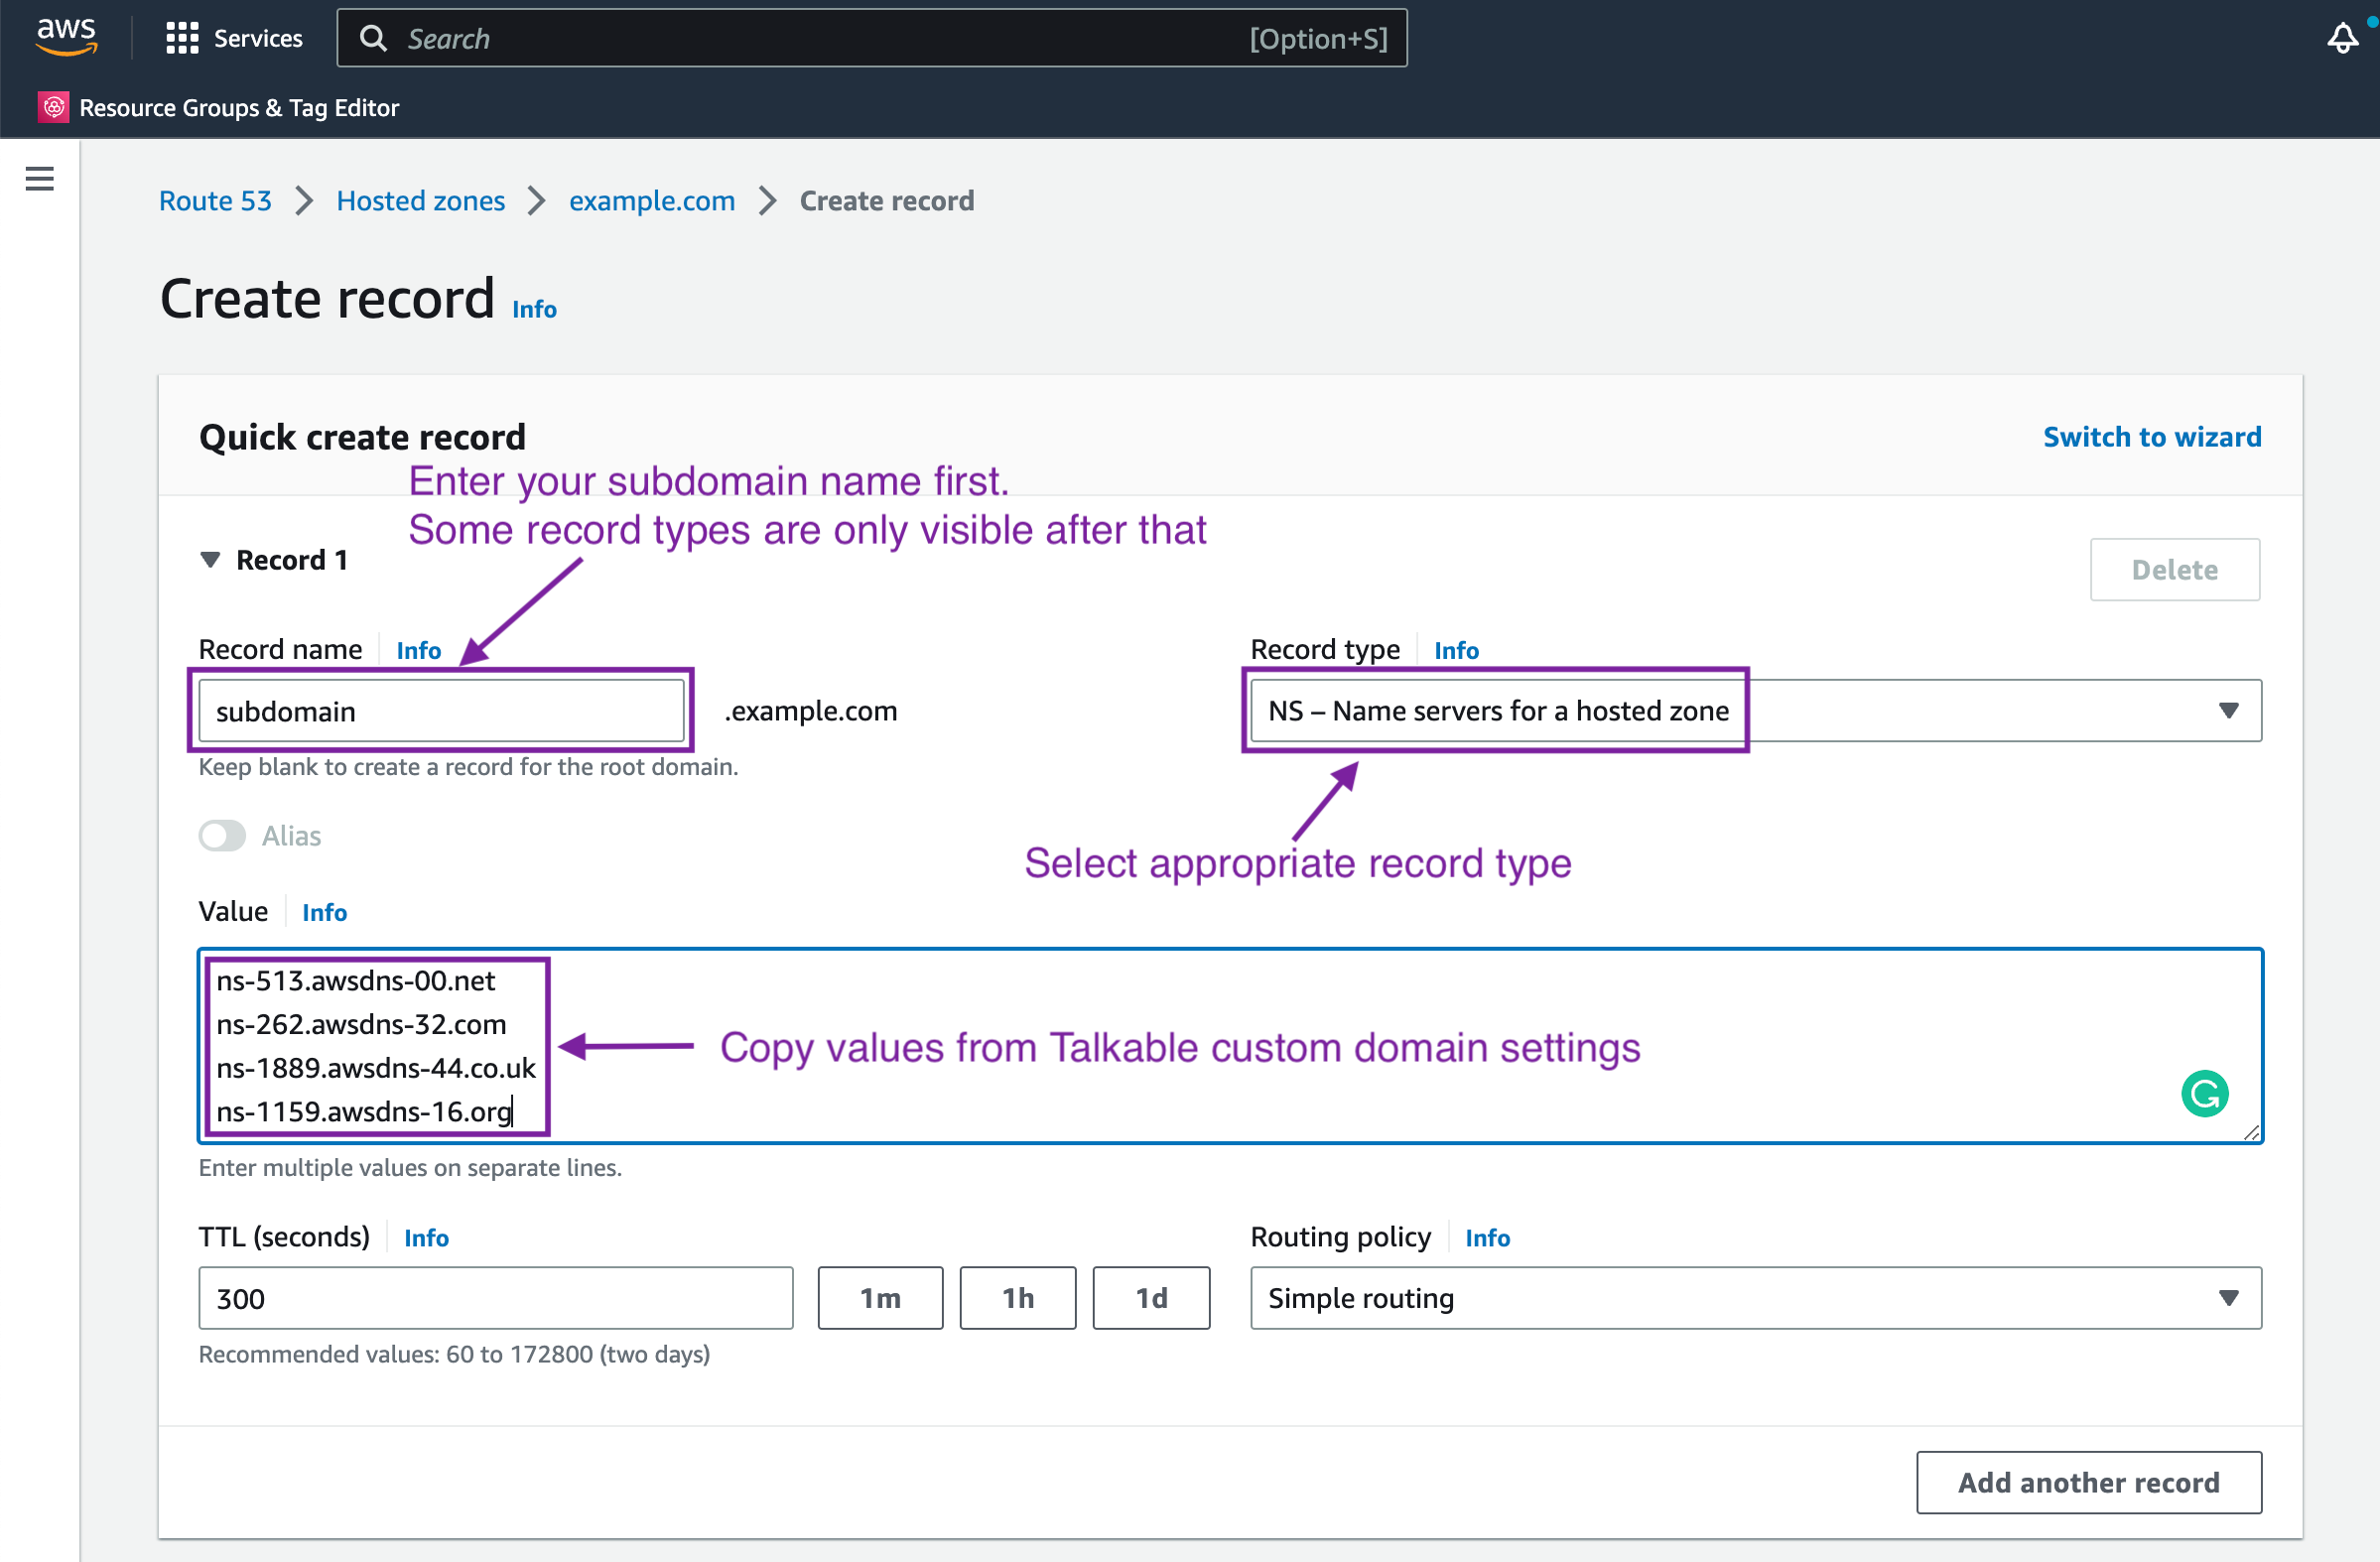
The instructions below use subdomain.example.com as an example of a custom domain where example.com is your domain.
Go to Hosted zones and select your main domain hosted zone (for instance, example.com).
Once the domain is selected, click “Create record” button.
In the opened window, enter the subdomain part in the “Record name” field. Note that the main domain part (.example.com) needs to be omitted since it is already accounted for. In some cases, sub-subdomain separated by dot may need to be entered, e.g. email.subdomain for a click-tracking CNAME record.
Select appropriate record type (might be NS, CNAME, MX, etc.).
Copy the DNS record value (or values) from the Talkable custom domain settings into the “Value” field. Note: For NS and MX record types, insert multiple values separated by newline if they share the same “Record name”.
Click “Create records” once you are ready.